Destructive testing of a used aerial fabric
on The Machine That Breaks Things
Phil Servita
aerialist at frobmob dot org
May 2007
Last updated: 14 july 2007
Fabric #1: 105 inch wide 100% nylon single guide bar tricot weave
TestSetup
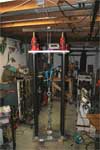 The fabric was tested to destruction using The Machine That Breaks Things,
a home-brew tensile stress tester. 8-foot sections of the fabric bolt were
taken, from various sections along the length of the fabric. The first one
came from the bottom third, where
it gets the more abuse from aerialists stepping on it and grinding it with
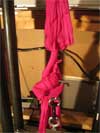
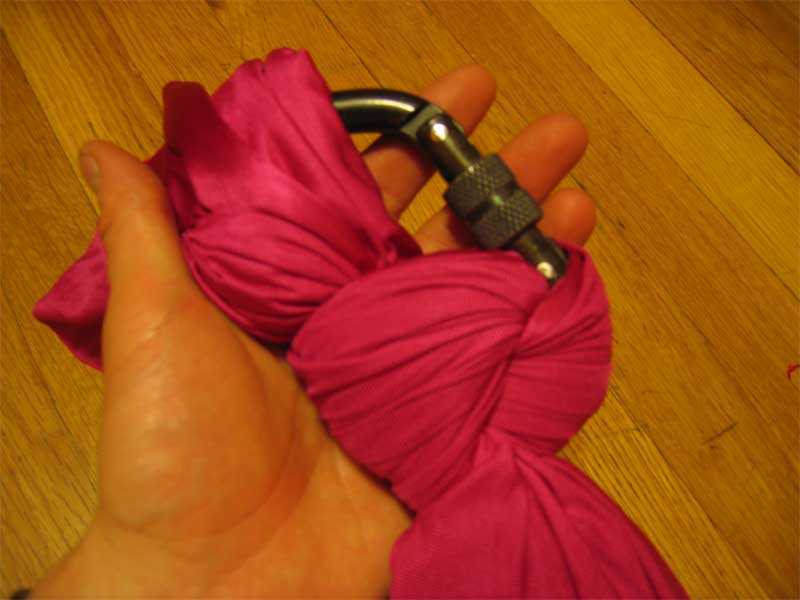
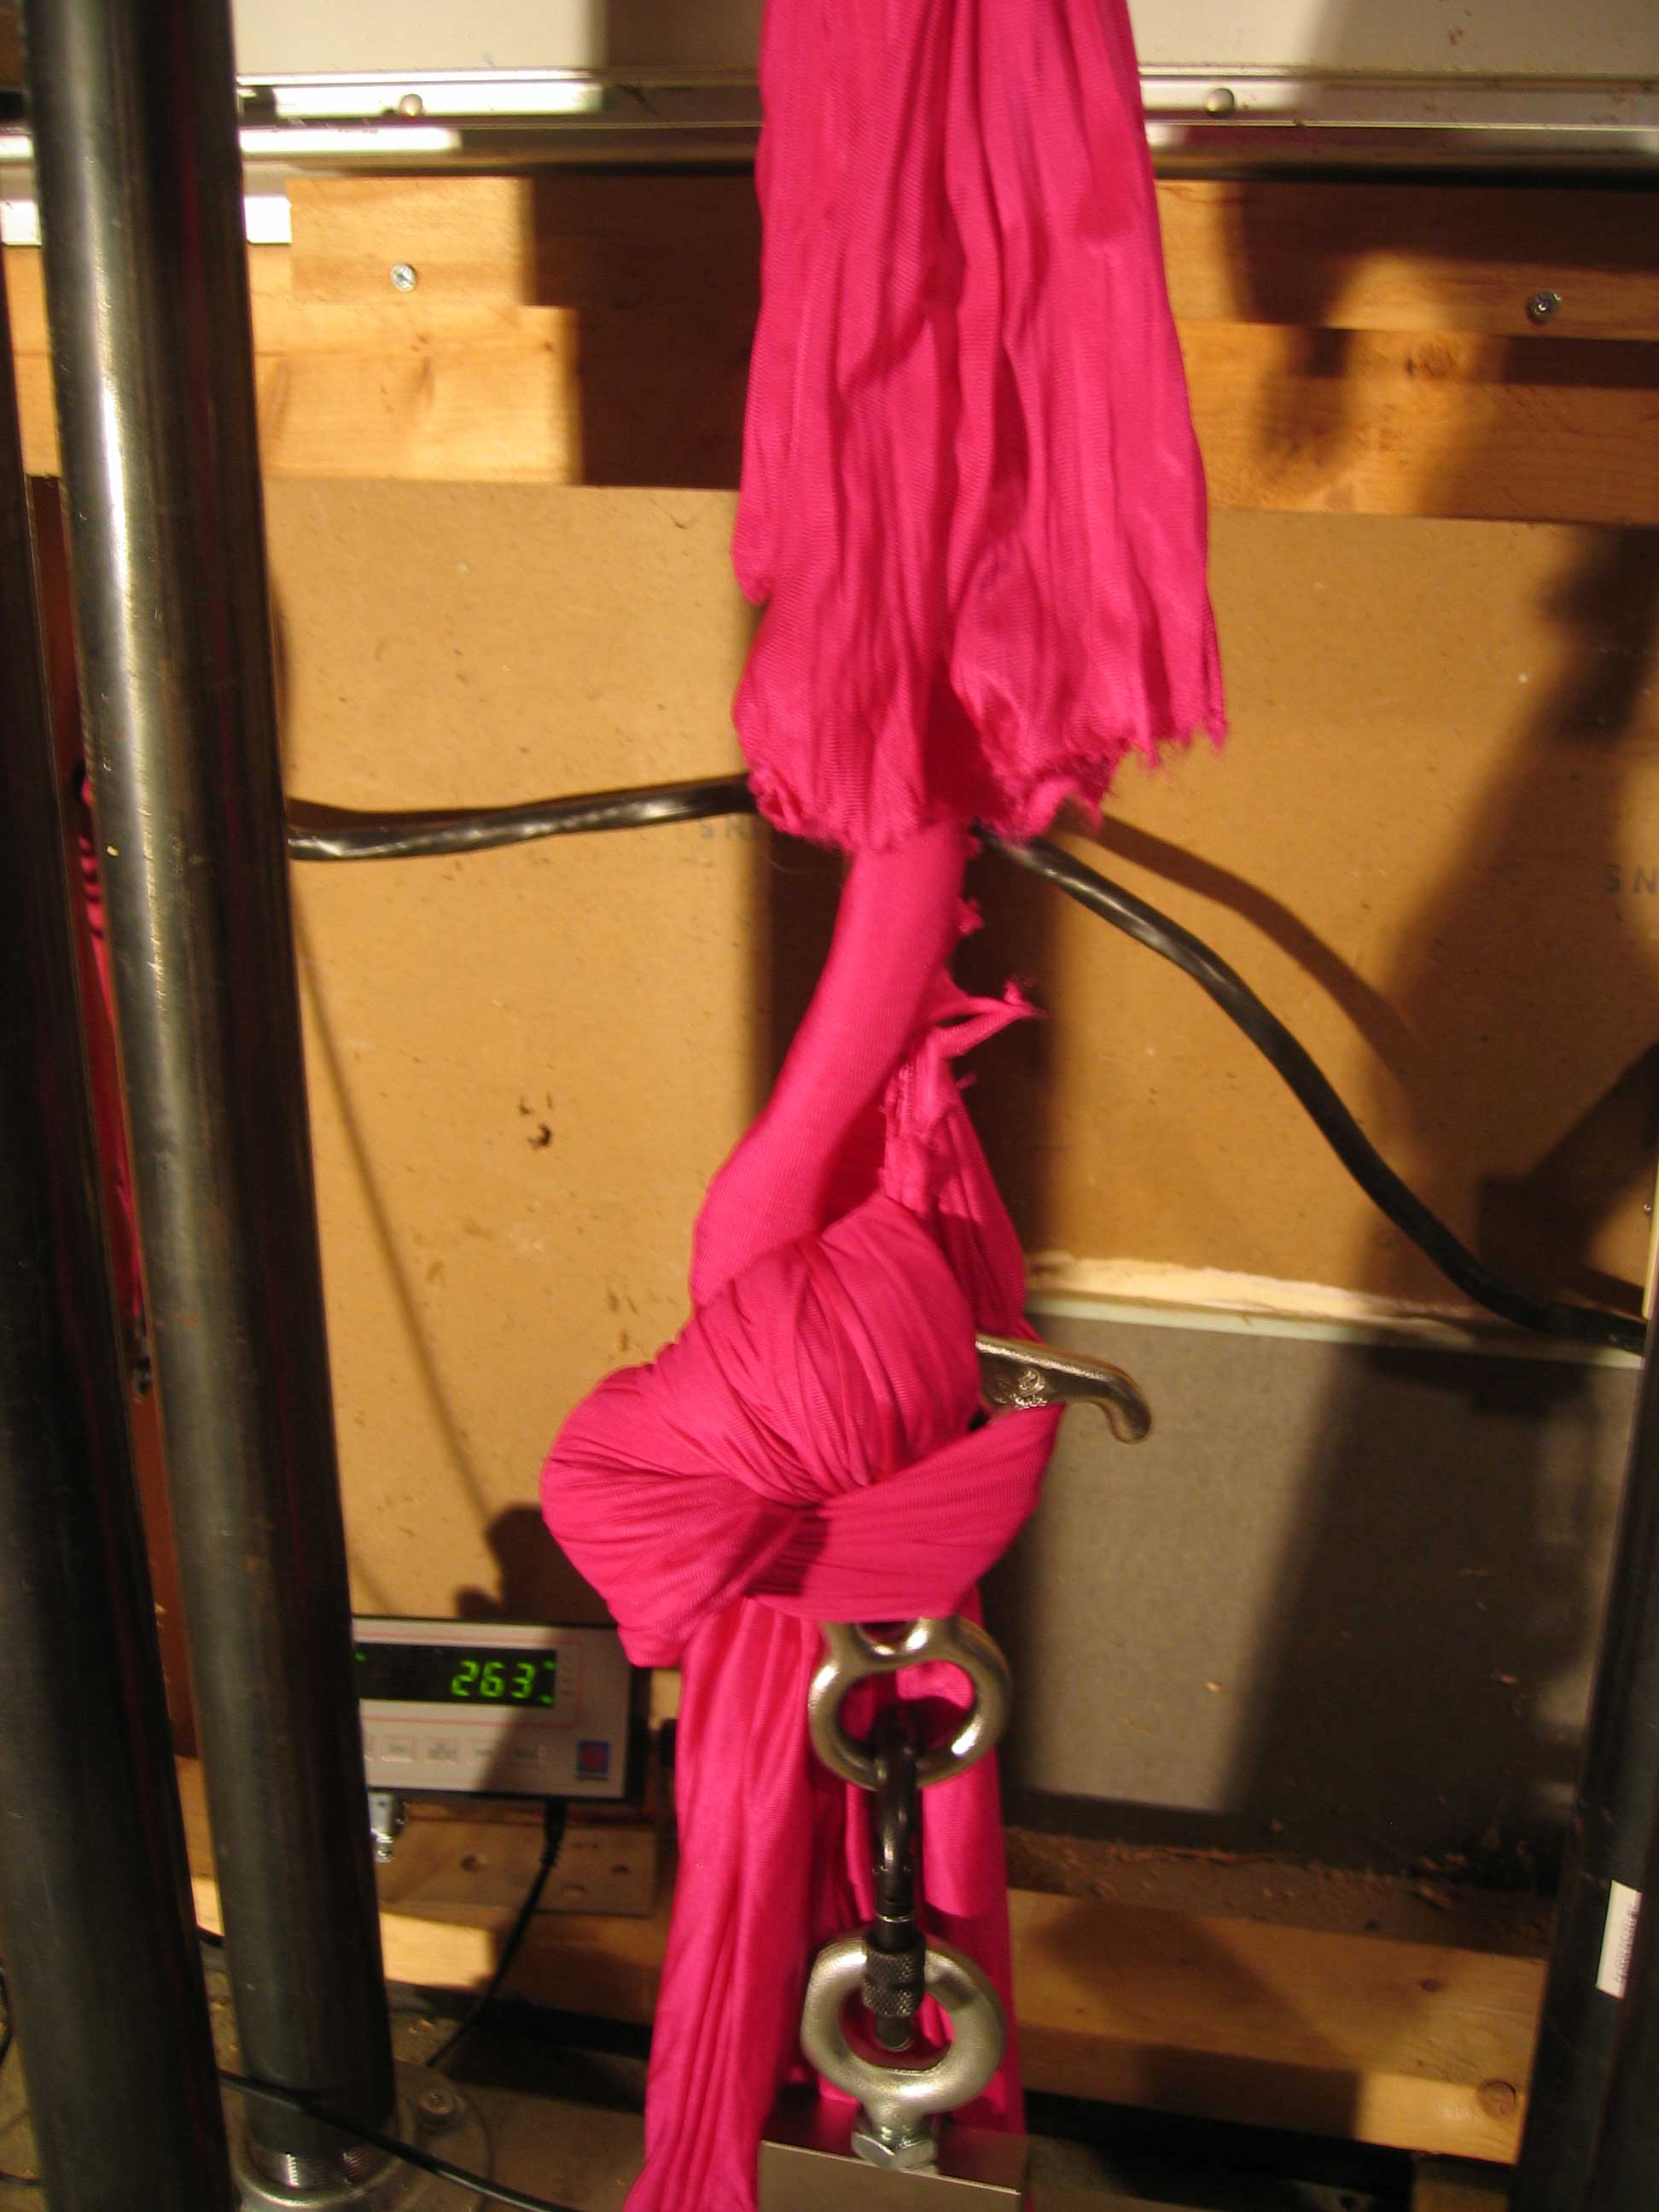
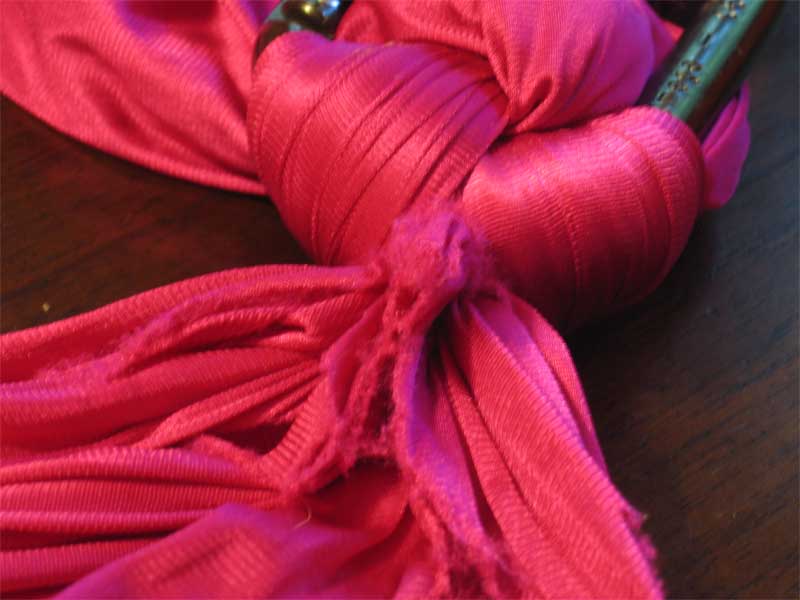
dirt and rosin. One end of the fabric was tied off
to a steel caribiner (an Omega screwgate D), as depicted in this picture:
The fabric was tested to destruction using The Machine That Breaks Things,
a home-brew tensile stress tester. 8-foot sections of the fabric bolt were
taken, from various sections along the length of the fabric. The first one
came from the bottom third, where
it gets the more abuse from aerialists stepping on it and grinding it with
dirt and rosin. One end of the fabric was tied off
to a steel caribiner (an Omega screwgate D), as depicted in this picture:

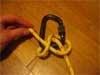
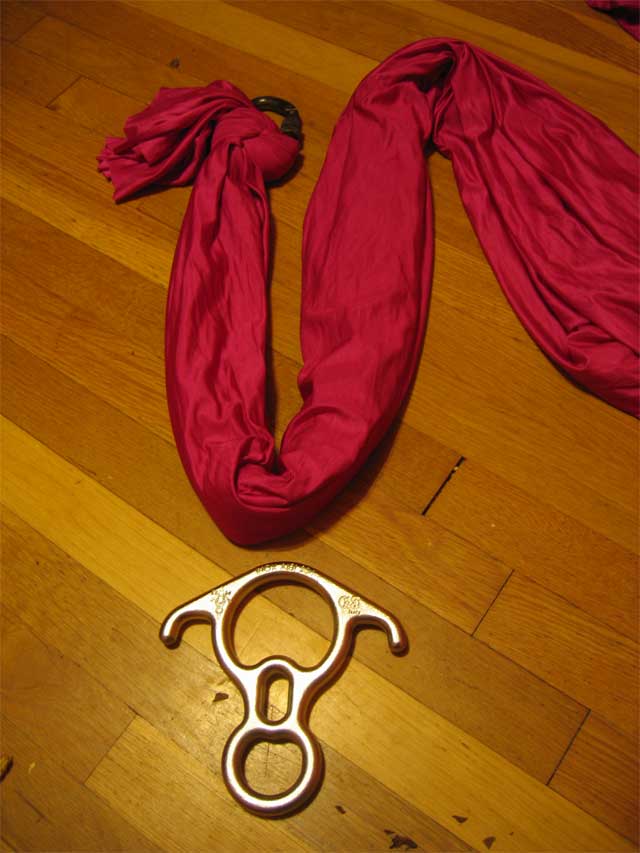
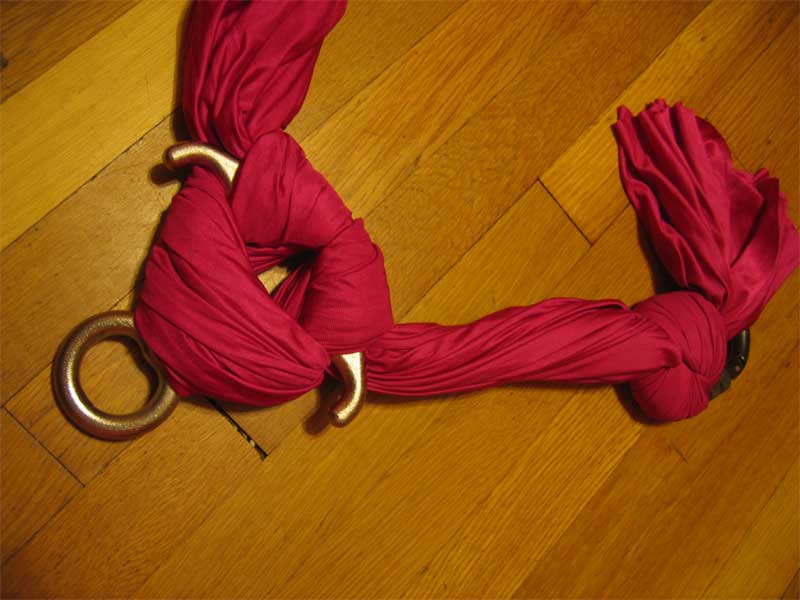
and the other was rigged in a commonly rigged fashion on a stainless steel
Rescue 8. A bight was made in the fabric:
 and then the fabric was rigged onto the 8. The method used is documented
Here (Aircat handout) and Here (Nimble Arts handout).
and then the fabric was rigged onto the 8. The method used is documented
Here (Aircat handout) and Here (Nimble Arts handout).
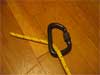
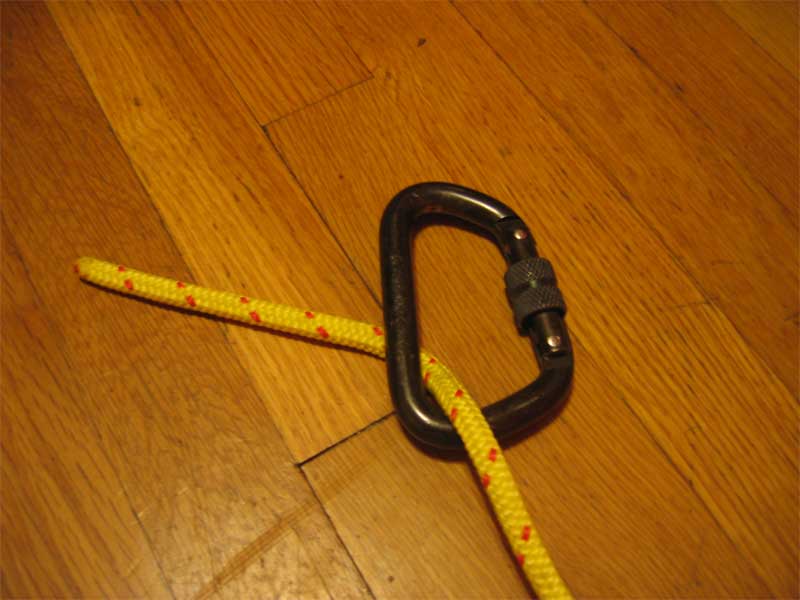
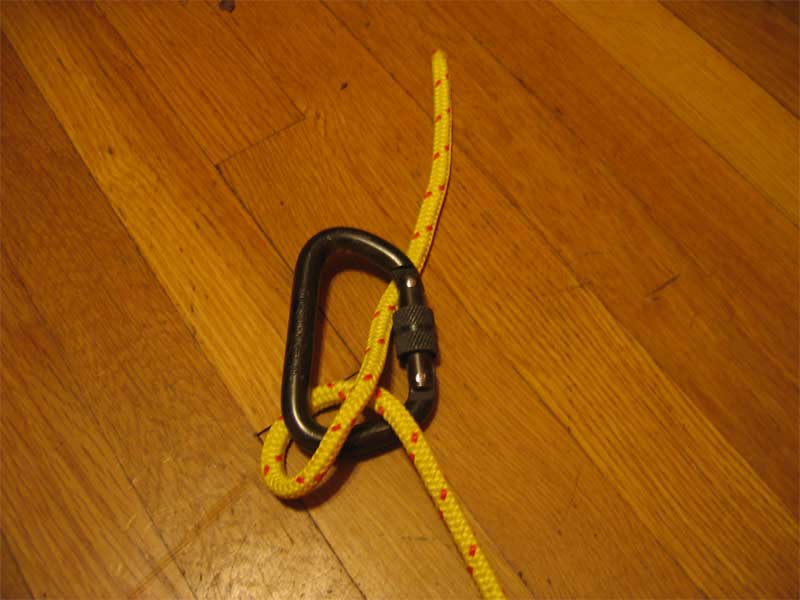
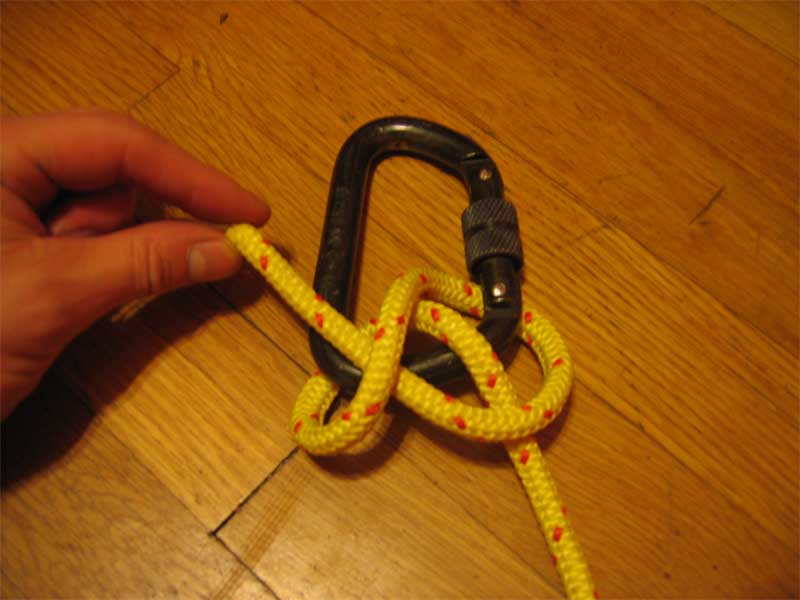
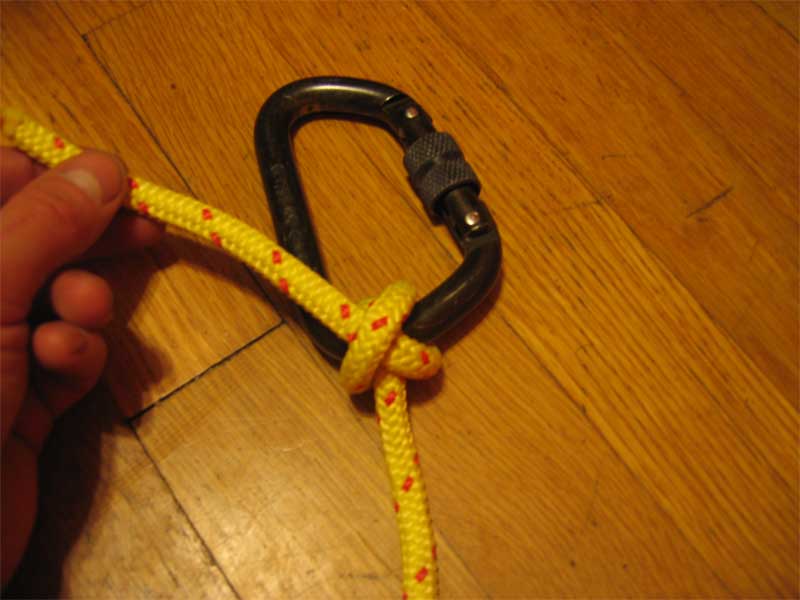
How i formed "knot" on the D biner would be very hard to illustrate using
fabric, because of its bulk. This is what i used, illustrated with a piece of
rope:
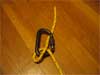


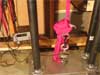
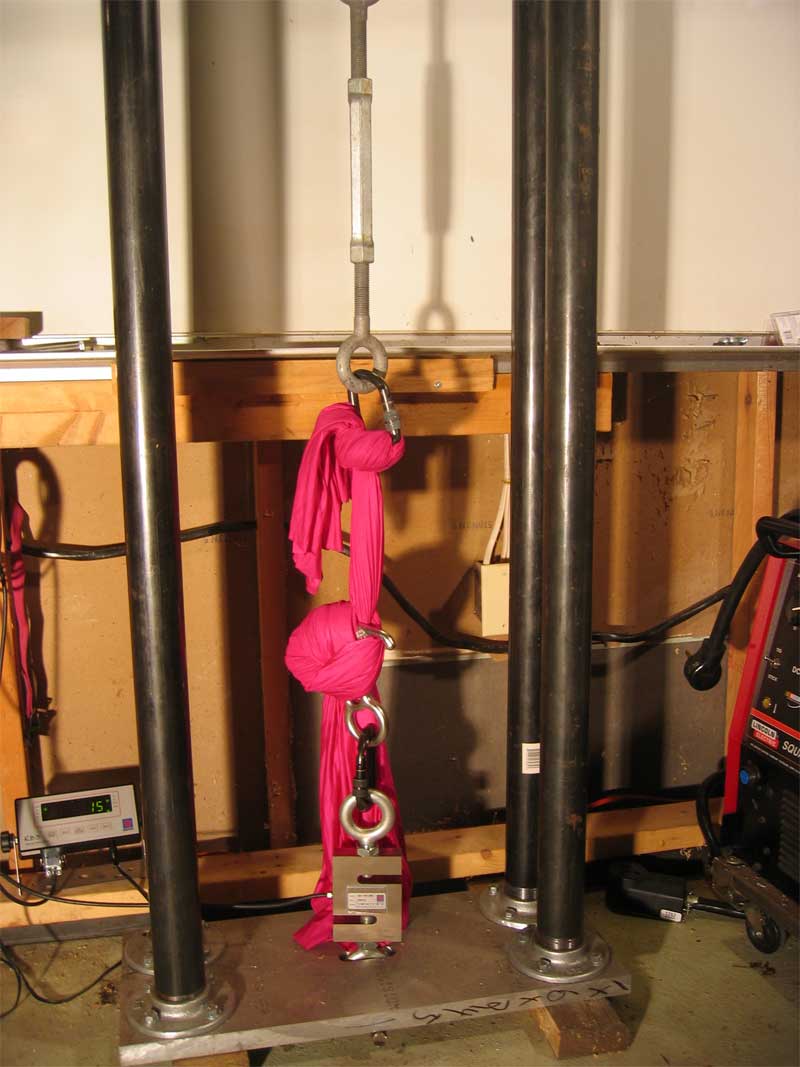
When done, we now have this:
 , and hooked up onto the Machine That Breaks Things:
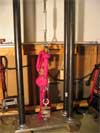
Note that we are only testing a single side of fabric. I wrapped the free end
on the rescue-8 side through the large hole of the 8 a couple of times such
that there was less free fabric lying around.
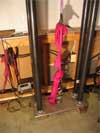
The Actual Pull Test
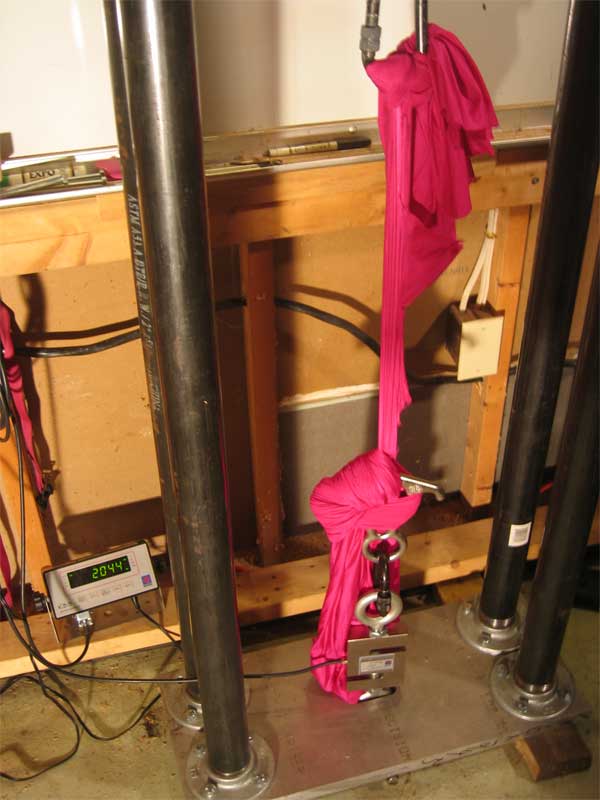
OK. Lets start pulling. after an initial stressing to 500 to set everything,
we start slowly increasing until badness happens. Here we are at ~1400:
We keep going. 1500...1700...2000...2200...2300...
at 2340: *SNAP* *RIP*...And now the fabric has a flap hanging off. The tension
in the system has dropped to 1720, but is holding there steady. Here is
what the first failure looks like:

OK, were done, right? Nope. The fabric is holding steady, with about 1700
pounds tension in the system. I drop it back to about zero, and look at the
damage. It's pretty clear that this fabric is done for, and no one would ever
try to use it. Lets take it back up for another cycle, and see what it can hold now. 500...1000...1500...1700...2044 ...
...
...SNAP*RIP* at 2100 we get our next failure. The tension in the system drops again, to 1740... and holds pretty much steady there.
We repeat this procedure a couple of more times;
releasing tension back to zero, then
pulling to the next failure again.
During the next cycle, i run out of pull range.
The hydraulic jacks have a range of 9 inches, and there is no space
to take up in the turnbuckle. Additionally, I would have to pull the top
biner attachment through the top plate to go further. So i need to take out
the turnbuckle and replace it with something smaller. I back off the force
to zero, and do so. I can't get the turnbuckle eye off the fabric biner without
undoing the knot (there just wasnt enough space to get it through the gate
with the fabric bunched up down there), so i removed most of the turnbuckle
and left the eye to just hang there. ugly, but no technical problem.
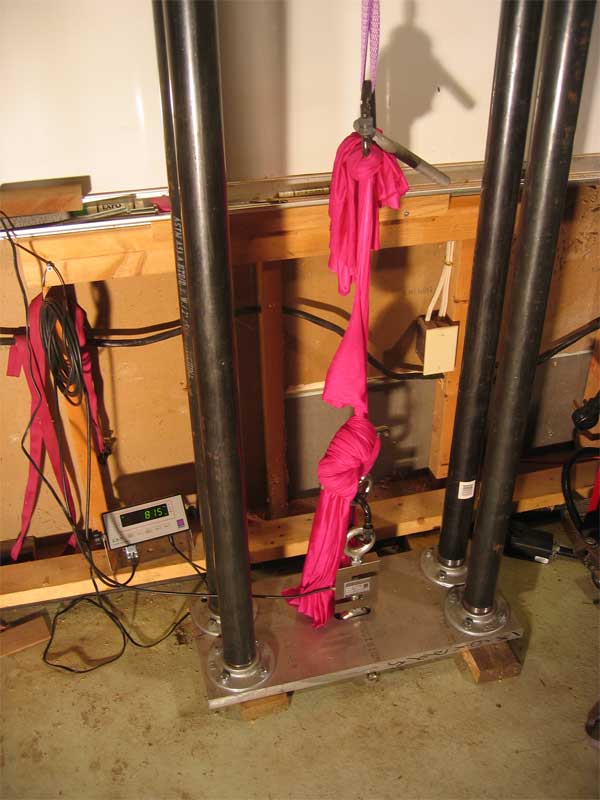
Some frames from the third cycle:
at 815
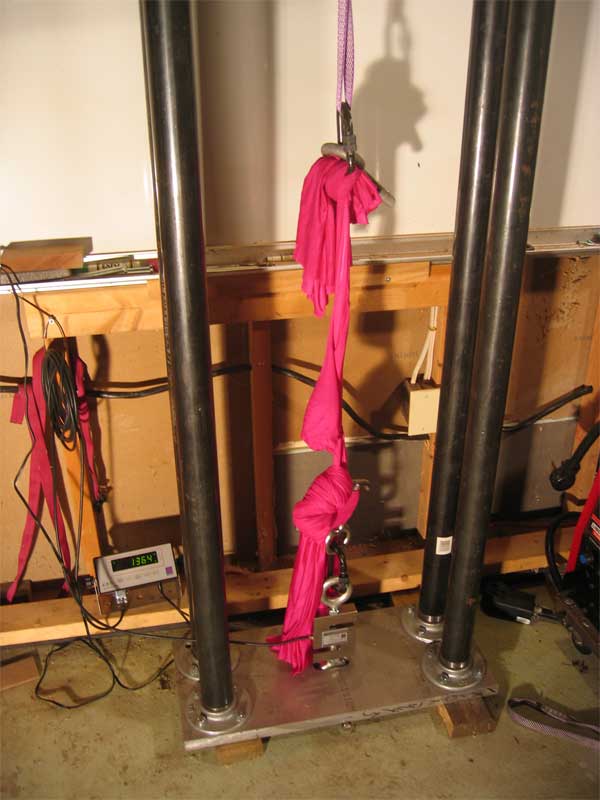
 at 1364
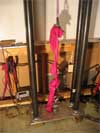
...SNAP *RIP* failure at 1940, with tension dropping back to 1520, then holding steady.
Some frames from the fourth cycle, at about 600. Fabric is pretty shredded now.


...failure at 1200, with tension dropping back to 900. At this point the
tension in the system is slowly decreasing if you let it sit.
The numbers for the next 2 cycles are:
failure at 650, with tension dropping back to 269.
failure at 347, with tension dropping back to 19. At this point,
it was Game Over.
This frame is from cycle 6.
The fabric could *still* hold my weight in this condition, were i stupid
enough to try.
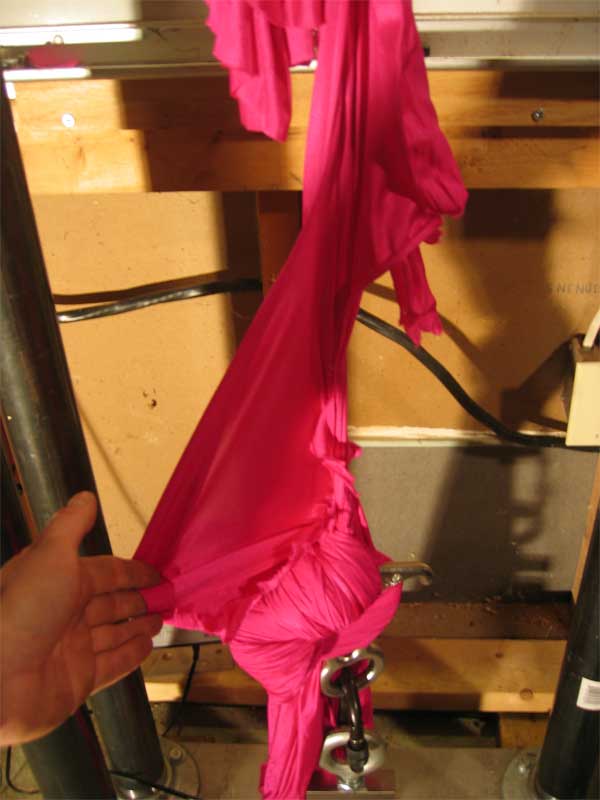
Aftermath shots.
Ripped Edge
Tearing inside the turns in the Rescue 8 rigging
The final numbers from sample #1:
cycle 1: partial failure at 2340, with tension dropping back to 1720.
cycle 2: partial failure at 2100, with tension dropping back to 1740.
cycle 3: partial failure at 1940, with tension dropping back to 1520.
cycle 4: partial failure at 1200, with tension dropping back to 900.
cycle 5: partial failure at 650, with tension dropping back to 269.
cycle 6: partial failure at 347, with tension dropping back to 19.
Pull test of sample number 2:
Results were similar to sample #1.
cycle 1: increase to 1000, then release.
cycle 2: increase to 1300, then release.
cycle 3: increase to 1500, then release.
cycle 4: increase to 1800, then release.
nothing notable happened in cycles 1-4.
cycle 5: partial failure at 2145, tension dropping back to 1800. release.
cycle 6: partial failure at 2100, tension dropping back to 1780. release.
cycle 7: increased to 1800, ran out of jack extension, released and adjusted jack shims before next cycle.
cycle 8: partial failure at 2100, tension dropping back to 1800. release.
cycle 9: partial failure at 1800, tension dropping back to 1750. release.
cycle 10: partial failure at 1800, tension dropping back to 1150. this fabric is about done for.
cycle 11: partial failure at 1300, tension dropping back to 600.
cycle 12: total failure at 550.
For sample number 3, i took more data.
My measuring setup allows for real-time measurements at approximately an 11 hz
sample rate. For this next fabric sample, i added my computer into the mix and
logged the tension in the system in real-time. Graphs, with some analysis are
provided as well as the usual numbers. Click on the thumbnails for the full
graph.
 Cycle 1. Pull to 500, then release. Nothing notable occured.
 Cycle 2. Pull to 1000, then release. Nothing notable occured.
 Cycle 3. Pull to 1500, then release. Nothing notable occured.
 Cycle 4. Pull to 2000, then release. Nothing notable occured.
By now you might be wondering: "What are those highlighted pink rectangles in the graphs?
The pink rectangles show sections of the graph where i have stopped pumping
the jacks. The fibers of the fabric are slowly stretching under the
existing tension, (and possibly shifting around as well), and in doing so
relieving tension in the system. You can easily tell the difference between
this, and when i actually open the valves to let tension out of the system;
the latter gives a much more sharp (and linear) dropoff in force, whereas the
fabric self-tension-relief behavior is gradual, and follows a curve that looks
like an inverse exponential. (followup research question; is it actually
inverse exponential, or something else?) The difference is easiest to see in
the graphs of cycle 4 and 5, but shows up in all of them. (the graph of cycle
2 does not include the "open-valve-release-tension" part of the cycle. The
fabric self-relieve behavior is pretty clear. The pink rectangles will appear
in all the graphs; they will become important later on.
 Cycle 5. Pull to partial failure, then release.
In this cycle, i pulled until i heard the first rip/snap occur, This happened
at 2060. A tiny flap of fabric opened up. I let the system sit for a couple
of seconds, during which the fabric self-relieved to about 1800. Tension was
then released.
 Cycle 6. Pull to partial failure, then release.
again, i pulled until i heard the first rip/snap occur, This happened
at 2240. More fabric detached; Again, I let the system sit for a couple
of seconds, during which the fabric self-relieved to about 1800. Tension was
then released.
 Cycle 7. Pull to partial failure, then release.
The next partial failure occured at about 2040. tension dropped to just under
2000, ten self-relieved to about 1850 before i released tension completely.
 Cycle 8. Pull to partial failure, then release.
Here is where we have our first large failure. (which i define as
"the rip/snap noise was louder and a visibly larger amount of fabric ripped)
The failure occured at 2248, and tension in the system dropped immediately to
1550, then slowly dropped in the self-relief mode. At T=~273 seconds i let
the tension out of the system.
Why does the time start at about 123 in this graph? Good question. I forgot
to turn off the data logger in between cycle 7 and 8, so i ended up with
one file which contained both cycles 7 and 8.
Time to look closer. The Pink Rectangles reveal their purpose.
 Cycle 8 again, a closeup. Lets look a little closer at the area of the graph
that contains the failure. The big failure is easily picked out of the graph;
it's the steep line segment. And now, you know why i've been adding the
pink rectangles; We can now see *exactly how long* the failure event takes,
because we can identify when the self-relief mode of the fabric behavior
begins. (we can also see the fabric having micro-failures just before the
big one; I was adding tension into the system via the jacks right up until the
loud snap)
Cycle 8 again, a closeup. Lets look a little closer at the area of the graph
that contains the failure. The big failure is easily picked out of the graph;
it's the steep line segment. And now, you know why i've been adding the
pink rectangles; We can now see *exactly how long* the failure event takes,
because we can identify when the self-relief mode of the fabric behavior
begins. (we can also see the fabric having micro-failures just before the
big one; I was adding tension into the system via the jacks right up until the
loud snap)
Lets zoom in again:
 Cycle 8, still closer in. You can get a better idea of how long the failure
lasted. It's not that short, really. By looking at the actual data from the
log file in this area, I could determine that the actual failure occured
between t=254.63 and t=255.44, for an actual event time of .81 seconds.
Recall that a tensile force of between 2248 and 1550 lbf is being applied to
the fabric during this entire .81 seconds, and due to this force, fabric is
being destroyed during this time period.
Cycle 8, still closer in. You can get a better idea of how long the failure
lasted. It's not that short, really. By looking at the actual data from the
log file in this area, I could determine that the actual failure occured
between t=254.63 and t=255.44, for an actual event time of .81 seconds.
Recall that a tensile force of between 2248 and 1550 lbf is being applied to
the fabric during this entire .81 seconds, and due to this force, fabric is
being destroyed during this time period.
So? where are we going with this?
 This is a graph of one of our performers doing a 4-5 foot slack drop on
a fabric of this type. (it may have even been the same exact one, but in any
case it was on a fabric from the same bolt as the one tested) In the blue
rectangle, i have highlighted the region on which the peak force (700lbf)
occurred. The entire region in which the force exceeds 500 pounds is
approximately .2 seconds. I'ts close enough to a linear ramp and descent in
this region to simplify it to an average force of 600 lbs over .2 seconds. But
we'll be conservative and claim that the 700 pounds was applied over the
entire .2 second period. But the drop was done on *two* fabric tails,
so each one only sees 350 pounds for the .2 seconds. Which means, to a
first order, that if this performer would have been stupid enough to
perform this drop on an apparatus consisting of two fabric tails equivalent
to the above damaged fabric after cycles 1-8,
the fabric would still have held, and it appears that not only was there a
safety factor of about 5x in applied force, but *also* a 4x safety factor
in *impulse time*.
This is a graph of one of our performers doing a 4-5 foot slack drop on
a fabric of this type. (it may have even been the same exact one, but in any
case it was on a fabric from the same bolt as the one tested) In the blue
rectangle, i have highlighted the region on which the peak force (700lbf)
occurred. The entire region in which the force exceeds 500 pounds is
approximately .2 seconds. I'ts close enough to a linear ramp and descent in
this region to simplify it to an average force of 600 lbs over .2 seconds. But
we'll be conservative and claim that the 700 pounds was applied over the
entire .2 second period. But the drop was done on *two* fabric tails,
so each one only sees 350 pounds for the .2 seconds. Which means, to a
first order, that if this performer would have been stupid enough to
perform this drop on an apparatus consisting of two fabric tails equivalent
to the above damaged fabric after cycles 1-8,
the fabric would still have held, and it appears that not only was there a
safety factor of about 5x in applied force, but *also* a 4x safety factor
in *impulse time*.
OK. Lets break this thing already.
 Cycle 9. Pull until complete failure.
The fabric partially fails at about 1400, tension dropping back to about 1300.
We keep pulling, and at 1500 the fabric rips apart completely.
Final numbers for sample #3:
cycle 1: increase to 500, then release.
cycle 2: increase to 1000, then release.
cycle 3: increase to 1500, then release.
cycle 4: increase to 2000, then release.
nothing notable happened in cycles 1-4.
cycle 5: partial failure at 2060, tension dropping back only slightly. release.
cycle 6: partial failure at 2240, tension dropping back only slightly. release.
cycle 7: partial failure at 2040, tension dropping back to 1940. release.
cycle 8: partial failure at 2248, tension dropping back to 1550. release.
cycle 9: partial failure at 1400, tension dropping back to 1300. Continue pulling. fabric rips completely at 1500.
Aftermath shots from sample #3
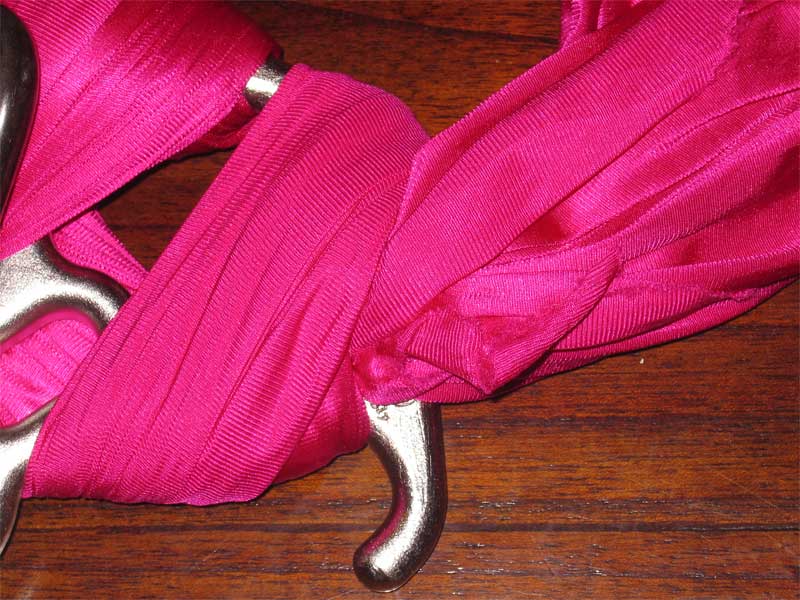
Picture of the fabric at the rescue 8. The
fabric took very little damage at this end.
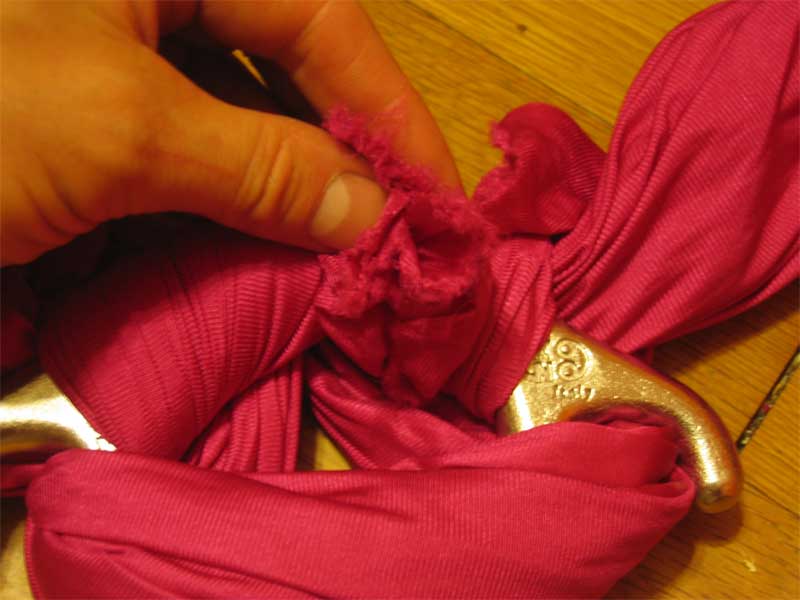
Picture of the fabric at the D biner end.. The
fabric took most of its damage here. This is not surprising, the D biner
attachment forces much tighter compression and smaller bend radiuses than
the rescue 8 side. In fact, in trials 2 and 3, i was unable to remove the
fabric remains from the D biner by hand. I had to cut it off with a knife.
Discussion.
As we can see here, the fabric never sustained a catastrophic failure.
What was done here was originally planned to be a single pull to failure,
but as it turned out the fabric did not actually act that way. Instead, it
underwent a series of failures, wherein at each pull cycle, a partial failure
both relieved stress in the system, and allowed for another pull cycle to
take place. With the exception of cycle 4, each time the next failure
occurred at a tension noticeably higher
than the relieved tension from the previous cycle. This suggests that
castastrophic failure of an aerial fabric of this type and size,
rigged as described here, is not a likely occurrence.
Of course, i *could* have just kept going, doing a single pull until we
eventually tore the fabric in half, but that wouldn't be a good analogy for the
types of force an actual aerialist would apply. An aerialist is not a testing
machine. and can only apply significant loads for *very* brief periods of time.
This series of pulls is a much more strenuous test of the fabric than an aerialist could ever deliver, not just due to the force involved, but also the time
duration. It made more sense to do repeated cycles to near zero, as that more
closely models what an actual aerial act would generate.
The reader is STRONGLY CAUTIONED that this result says *nothing*
about the results that might be obtained with different fabric construction,
different fabric composition, different rigging technique, different suppliers,
different manufacturers, etc. It might not even say anything about the
next section I test *from the same sample piece*. This could just be a
fluke. I don't think it is, but the only way to find out is to do more
tests. Such tests are planned, and the results will be posted as the data
comes in.
Things to explore in future testing:
This data point suggests the possibility that within a certain range
of widths, the width of your fabric may not have that much impact on
ultimate strength. Is this true? And if so, within what range?
Is the multiple-failure behavior dependent on what sort of knot you
rig with?

 and then the fabric was rigged onto the 8. The method used is documented
Here (Aircat handout) and Here (Nimble Arts handout).
and then the fabric was rigged onto the 8. The method used is documented
Here (Aircat handout) and Here (Nimble Arts handout).

 , and hooked up onto the Machine That Breaks Things:


 ...
... at 1364

 Cycle 1. Pull to 500, then release. Nothing notable occured.
 Cycle 2. Pull to 1000, then release. Nothing notable occured.
 Cycle 3. Pull to 1500, then release. Nothing notable occured.
 Cycle 4. Pull to 2000, then release. Nothing notable occured.
 Cycle 5. Pull to partial failure, then release.
  Cycle 6. Pull to partial failure, then release.
  Cycle 7. Pull to partial failure, then release.
  Cycle 8. Pull to partial failure, then release.
  Cycle 8 again, a closeup. Lets look a little closer at the area of the graph
that contains the failure. The big failure is easily picked out of the graph;
it's the steep line segment. And now, you know why i've been adding the
pink rectangles; We can now see *exactly how long* the failure event takes,
because we can identify when the self-relief mode of the fabric behavior
begins. (we can also see the fabric having micro-failures just before the
big one; I was adding tension into the system via the jacks right up until the
loud snap)
Cycle 8 again, a closeup. Lets look a little closer at the area of the graph
that contains the failure. The big failure is easily picked out of the graph;
it's the steep line segment. And now, you know why i've been adding the
pink rectangles; We can now see *exactly how long* the failure event takes,
because we can identify when the self-relief mode of the fabric behavior
begins. (we can also see the fabric having micro-failures just before the
big one; I was adding tension into the system via the jacks right up until the
loud snap)
 Cycle 8, still closer in. You can get a better idea of how long the failure
lasted. It's not that short, really. By looking at the actual data from the
log file in this area, I could determine that the actual failure occured
between t=254.63 and t=255.44, for an actual event time of .81 seconds.
Recall that a tensile force of between 2248 and 1550 lbf is being applied to
the fabric during this entire .81 seconds, and due to this force, fabric is
being destroyed during this time period.
Cycle 8, still closer in. You can get a better idea of how long the failure
lasted. It's not that short, really. By looking at the actual data from the
log file in this area, I could determine that the actual failure occured
between t=254.63 and t=255.44, for an actual event time of .81 seconds.
Recall that a tensile force of between 2248 and 1550 lbf is being applied to
the fabric during this entire .81 seconds, and due to this force, fabric is
being destroyed during this time period.
 This is a graph of one of our performers doing a 4-5 foot slack drop on
a fabric of this type. (it may have even been the same exact one, but in any
case it was on a fabric from the same bolt as the one tested) In the blue
rectangle, i have highlighted the region on which the peak force (700lbf)
occurred. The entire region in which the force exceeds 500 pounds is
approximately .2 seconds. I'ts close enough to a linear ramp and descent in
this region to simplify it to an average force of 600 lbs over .2 seconds. But
we'll be conservative and claim that the 700 pounds was applied over the
entire .2 second period. But the drop was done on *two* fabric tails,
so each one only sees 350 pounds for the .2 seconds. Which means, to a
first order, that if this performer would have been stupid enough to
perform this drop on an apparatus consisting of two fabric tails equivalent
to the above damaged fabric after cycles 1-8,
the fabric would still have held, and it appears that not only was there a
safety factor of about 5x in applied force, but *also* a 4x safety factor
in *impulse time*.
This is a graph of one of our performers doing a 4-5 foot slack drop on
a fabric of this type. (it may have even been the same exact one, but in any
case it was on a fabric from the same bolt as the one tested) In the blue
rectangle, i have highlighted the region on which the peak force (700lbf)
occurred. The entire region in which the force exceeds 500 pounds is
approximately .2 seconds. I'ts close enough to a linear ramp and descent in
this region to simplify it to an average force of 600 lbs over .2 seconds. But
we'll be conservative and claim that the 700 pounds was applied over the
entire .2 second period. But the drop was done on *two* fabric tails,
so each one only sees 350 pounds for the .2 seconds. Which means, to a
first order, that if this performer would have been stupid enough to
perform this drop on an apparatus consisting of two fabric tails equivalent
to the above damaged fabric after cycles 1-8,
the fabric would still have held, and it appears that not only was there a
safety factor of about 5x in applied force, but *also* a 4x safety factor
in *impulse time*.
 Cycle 9. Pull until complete failure.
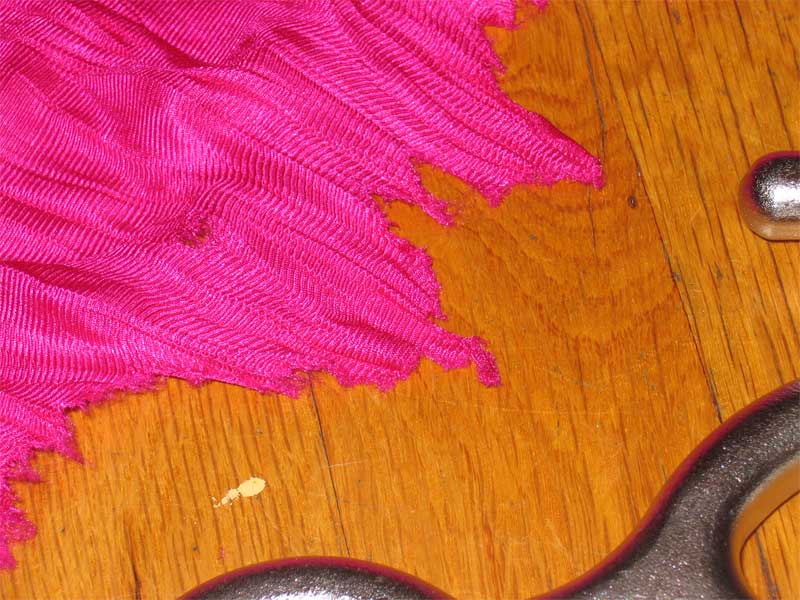